Testing Mendix applications using Selenium
Selenium is a useful tool for automating functional tests. In this post i’ll show you some tips and tricks about using Selenium IDE with Mendix. Selenium IDE is a Firefox plugin that enables you to record whatever you are doing in Firefox, so that you can repeat these steps as a test script.
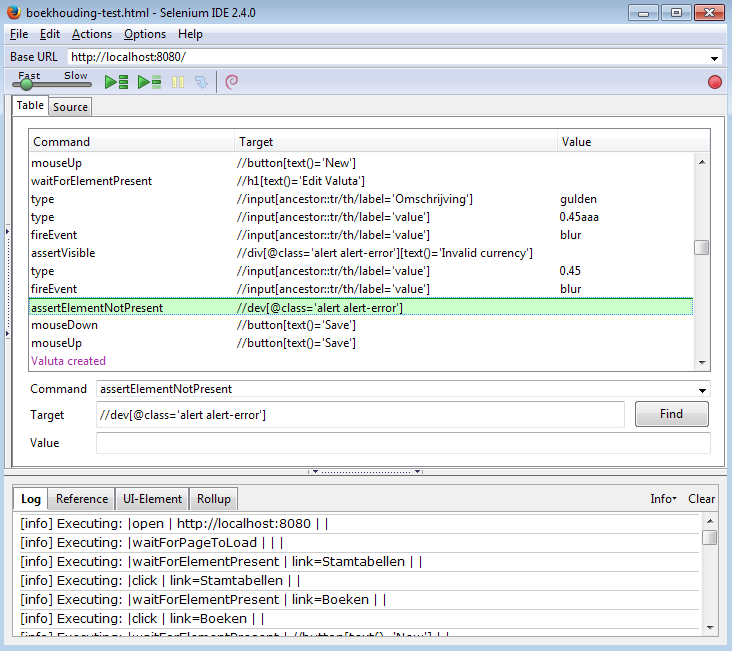
You can use Selenium IDE to record tests scripts, but these scripts need to be edited before you can use them:
-
Replace id targets with xpath targets
-
Most buttons you can target by the text in the button
mouseDown //button[text()='New'] -
Mendix 4 buttons aren’t implemented using a button tag, but use a series of nested divs and spans. Also, the mouseDown event handler doesn’t trigger execute the logic behind the button. Keypress with a return keySequence on the top div does the trick. (Tip: Inspect Element in Google Chrome has a tab called Event Listeners which lists all the event handlers of an html element.)
keyPress //div[contains(@class,'mendix_Button')][.//span[text()='New']] \\13 -
You can target input fields by the label before it:
type //input[ancestor::tr/th/label='Omschrijving'] test-valueThis xpath expression selects the input element, which is in a table row, that has a table header containing a label Omschrijving.
-
If you have a form with multiple columns, you can use the following xpath:
type //input[preceding::th[1]/label='Omschrijving'] test-valueThis xpath expression tells Selenium to select the input field where the closest preceding table header contains a label Omschrijving.
-
To choose a value from a dropdown list:
select //select[preceding::th/label='Af Bij'] label=AfThis selects the value Af from a dropdown list preceded bij a label Af Bij.
-
To edit an entity from a DataGrid table, you can use the following:
waitForElementPresent //table//tr/td/div[text()='test-transactie-1']
doubleClick //table//tr/td/div[text()='test-transactie-1']
This will cause a double click on a tablecell containing the text test-transactie-1.
-
-
Replace most mouse clicks with mouseDown mouseUp. To click on a button you need the following commands:
mouseDown //label[text()='Save']
mouseUp //label[text()='Save']
Btw, you don’t need to do this for popup alter windows. Here you can use click:
click //button[text()='OK'] -
Add a fireEvent blur after typing text in an input field:
fireEvent //input[preceding::th[1]/label='Btw percentage'] blur -
Add waitForElementPresent commands, for example:
waitForElementPresent //button[text='New'] waitForElementPresent //h1[text()='Boek'] -
An ofcourse, a test script wouldn’t be complete without some actual tests:
verifyValue //input[preceding::th[1]/label='Bon nummer'] 123This verifies that the page contains an input field preceded by a label Bon nummer contains the value 123.
assertVisible //table//tr/td/div[text()='inkoop-1-checked']This checks a table cell contains the value inkoop-1-checked.
assertVisible //h1[text()='Edit Boek']This verifies that the page contains a header with the text Edit Boek.
assertVisible //div[@class='alert alert-error'][text()='Invalid currency']This verifies that the page contains an error message with the text Invalid currency.
assertElementNotPresent //dev[@class='alert alert-error']This verifies that the page doesn’t contain any error messages.
This has been tested with Mendix 5.0.0 beta 7. You’ll probably need different xpath expressions for other versions of Mendix. Firefox inspector is a useful tool for inspecting the generated html to determine the correct xpath expressions.